DIY Biogas Digester: How to Build One for Your Home
Introduction
With rising energy costs and growing environmental concerns, many homeowners are turning to renewable energy solutions. A DIY biogas digester offers an excellent way to convert organic waste into usable energy right in your backyard. This system uses anaerobic digestion to break down food scraps, animal manure, and other organic materials, producing biogas (a mixture of methane and carbon dioxide) that can be used for cooking, heating, or even generating electricity.
In this guide, we’ll walk you through the step-by-step process of building a simple, cost-effective biogas digester for your home.
How a Biogas Digester Works
Before diving into construction, it’s essential to understand the science behind biogas production:
- 1.Anaerobic Digestion: Microorganisms break down organic matter in an oxygen-free environment, producing biogas (60-70% methane, 30-40% CO₂) and nutrient-rich digestate (a liquid fertilizer).
- 2.Feedstock: Kitchen scraps, animal manure, grass clippings, and crop residues work best. Avoid meat, dairy, and oily foods, as they can disrupt the digestion process.
- 3.Temperature & pH: The digester works best at 20-40°C (68-104°F). Cold climates may require insulation or heating.
Materials Needed
Basic Components
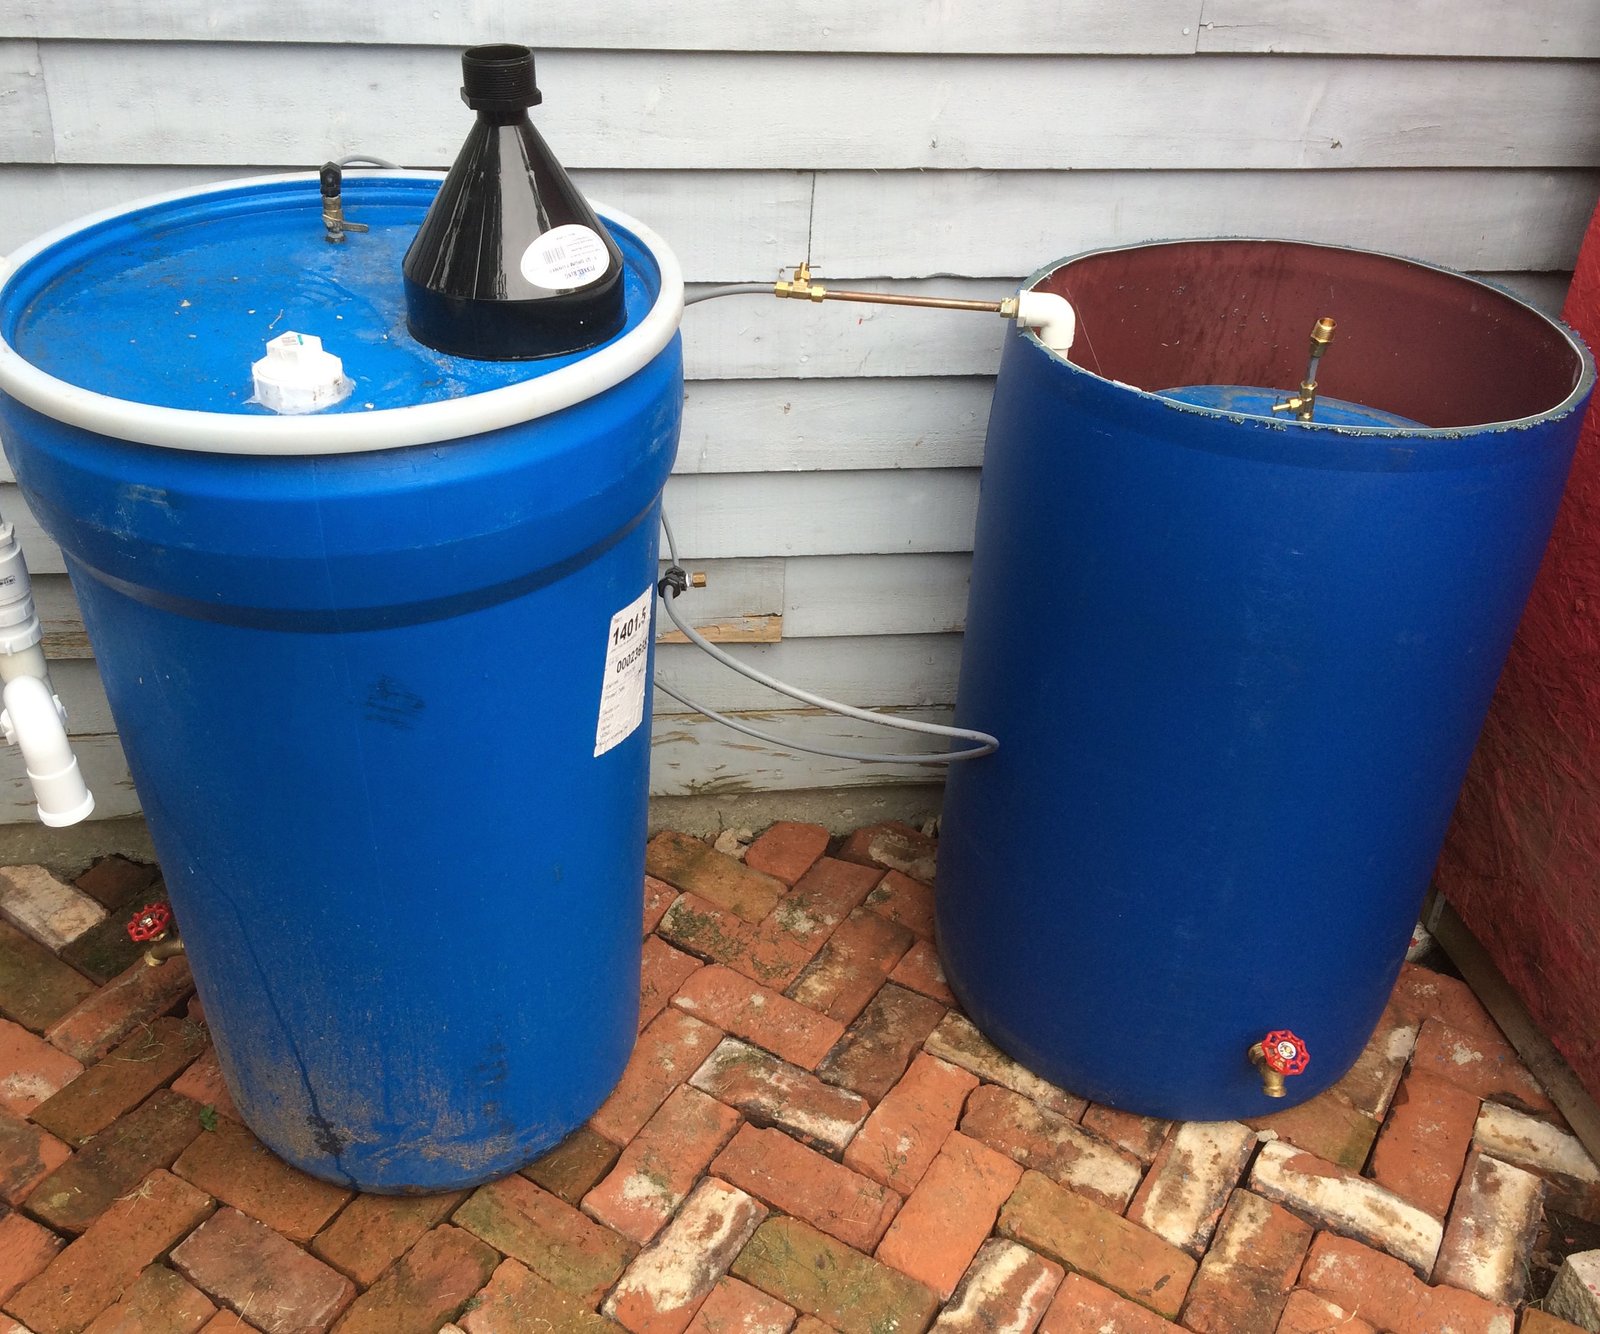
✅ Digester Tank – A sealed container where anaerobic digestion occurs (e.g., a plastic drum, IBC tote, or concrete tank).
✅ Inlet Pipe – For adding organic waste.
✅ Outlet Pipe – For removing digestate (liquid fertilizer).
✅ Gas Outlet – A hose or pipe to collect biogas.
✅ Gas Storage – A floating drum or balloon to store biogas.
✅ Sealant – Waterproof adhesive or silicone to prevent leaks.
✅ Valves & Fittings – To control gas flow.
Optional (For Efficiency & Safety)
🌡️ Thermometer – To monitor digester temperature.
⚖️ pH Meter – Ensures optimal microbial activity (ideal pH: 6.5-8.0).
🔥 Gas Burner or Stove – To use biogas for cooking.
🔧 Pressure Gauge – Prevents over-pressurization.
Step-by-Step Construction Guide
Step 1: Choose Your Digester Design
There are two common DIY biogas digester designs:
- 1.Floating Drum Digester – Uses a movable drum to store gas (more efficient but complex).
- 2.Fixed Dome Digester – A simpler, low-cost design where gas collects at the top of a sealed tank.
For beginners, we recommend the fixed dome digester using a plastic barrel or IBC tote.
Step 2: Prepare the Digester Tank
- 1.Clean & Seal the Container: Use a 200-liter (55-gallon) plastic drum or 1000-liter IBC tote. Ensure it’s airtight.
- 2.Drill Holes for Pipes:
- Inlet Pipe (top): For adding food waste/manure.
- Outlet Pipe (bottom): For draining digestate.
- Gas Outlet (top): Attach a hose to collect biogas.
Step 3: Install the Gas Collection System
- 1.Attach a Gas Hose to the top outlet and connect it to a storage balloon or floating drum.
- 2.Add a Water Trap (a small water-filled container) to filter out impurities like hydrogen sulfide.
Step 4: Set Up the Feeding System
- 1.Mix Feedstock: Combine 1 part manure (for microbes) with 3 parts food waste (for higher gas yield).
- 2.Add Water: Maintain a 1:1 ratio of solids to water for optimal digestion.
- 3.Load the Digester: Pour the mixture through the inlet pipe.
Step 5: Monitor & Maintain the Digester
- Check Daily: Ensure no gas leaks (use soapy water to test).
- Stir Weekly: Prevents clogging and improves digestion.
- Adjust pH: If digestion slows, add lime or wood ash to raise pH.
Using Your Biogas
1. Cooking Fuel
- Connect the gas hose to a biogas stove (modify a regular LPG stove if needed).
- 1 m³ of biogas ≈ 1 hour of cooking.
2. Heating & Lighting
- Use biogas in heaters or gas lamps (with proper ventilation).
3. Electricity Generation (Advanced)
- With a biogas generator, you can produce small amounts of electricity.
Troubleshooting Common Issues
| Problem | Cause | Solution |
|---|---|---|
| No Gas Production | Cold temps, wrong pH, or lack of microbes | Insulate digester, adjust pH, add cow manure |
| Bad Smell | Air leaks or sulfur buildup | Seal leaks, add iron oxide to absorb H₂S |
| Slow Digestion | Too much solids or low temp | Add water, insulate, or use a solar heater |
Safety Tips
⚠️ Avoid open flames near the digester – Methane is highly flammable.
⚠️ Ensure proper ventilation – CO₂ buildup can be dangerous.
⚠️ Never use metal containers for gas storage – Plastic or rubber is safer.
Conclusion
Building a DIY biogas digester is a rewarding project that turns waste into free, renewable energy. While it requires some initial effort, the benefits—lower energy bills, reduced waste, and a smaller carbon footprint—make it worthwhile.
With proper maintenance, your home biogas system can provide clean cooking fuel for years. Ready to take the plunge? Start small, experiment, and join the green energy revolution!